
Control window Contents
The control window Content shows which maps and objects, e.g. legends, freehand texts, inset mapn on a sheet or which layers are contained in a map.
After inserting the complete base map 8185 postal code areas and opening the control window content the EasyMap program window looks as follows:
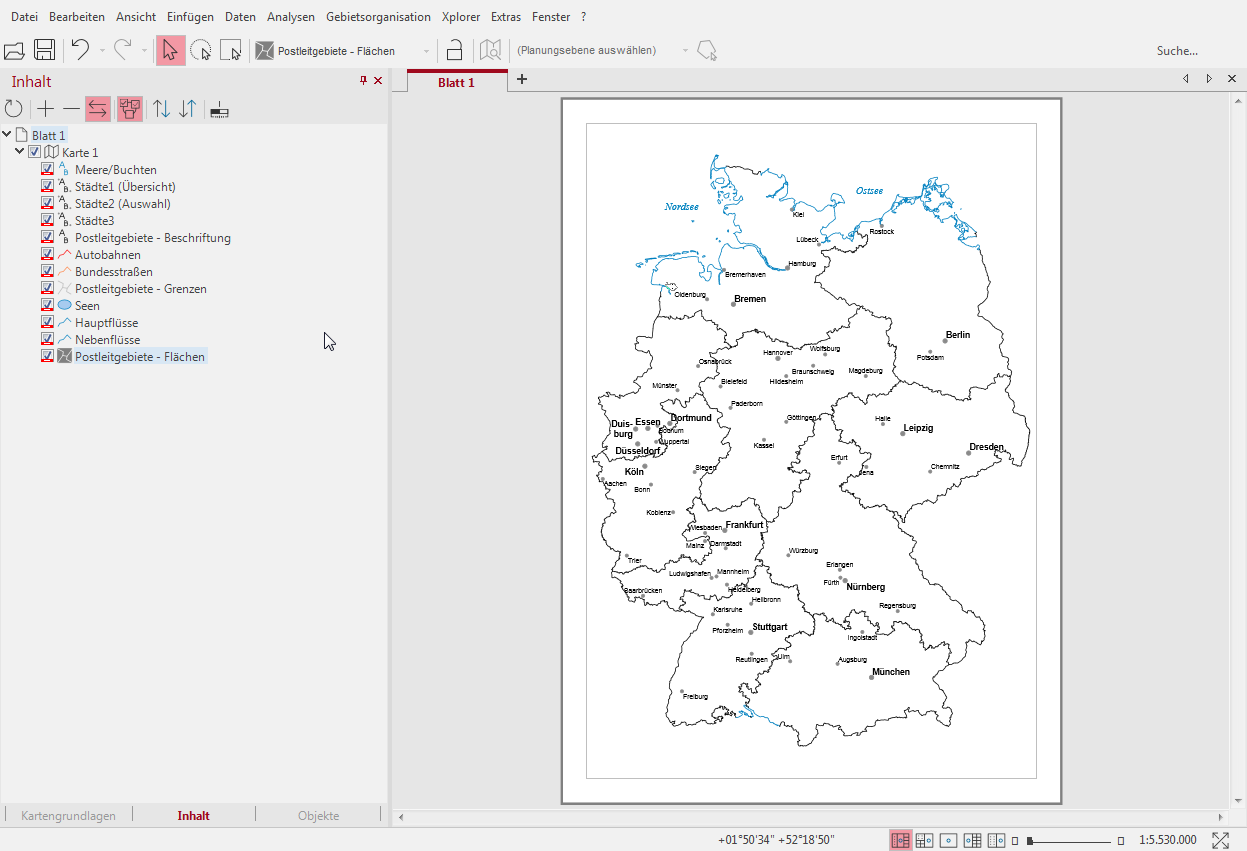
Sheet 1 contains a map; this contains the postal code areas (lettering, borders, areas) and the topography (cities, streets, rivers). All map contents are visible by default scale dependent. Since the automatic zoom function is activated, the map only shows the borders of the postcode zones and selected cities in the general view of Germany. EasyMap only makes the other contents visible when they are enlarged accordingly. Which contents are visible at a certain scale and which are not is determined by default settings in the base maps; these can of course be changed by the user. You can learn more about this automatic zoom function in the chapter on the control window Scale ranges.
The layers have three states, these states are required for the automatic zoom, which controls the view of the map depending on the scale.

|
visible to scale |

|
always visible |

|
never visible |
Move layers - copy - rearrange
The order of the list determines the character order in the map. The layers listed above are drawn last, i.e. they are in the foreground.
Moving and reordering
Each layer can be moved in the drawing order; either via the context menu of a layer or by drag&drop to its new position.
If you select one or more objects in the control window Content, you can drag these elements to another element by holding down the mouse button. The selected elements are then removed from the previous position and inserted at a different position. For example, you can draw a whole map on another hand. Some insert positions are not allowed, this is indicated during the Drag&Drop process by a corresponding cursor. For example, it is not possible to drag individual layers onto a sheet.
Copy
You can also copy objects using Drag&Drop, even into another workbook. Press the Shift button while dragging and dropping. The cursor is now displayed differently and indicates that you want to copy. When you release the cursor, the element is copied and pasted at the target position. If you drag an item from the Contents pane of one workbook to the Contents pane of another workbook, items can also be copied. Since it is not possible to move elements between different workbooks, the copy is always made in this case (even if the Shift key is not pressed).
Note: The same conditions apply for copying and pasting using Drag&Drop as for copying and pasting using the context menu. For details, see <a href="../../inhalte-bearbeiten/kopieren-einfuegen.htm">Copy and Paste</a>. Note that some copying constellations are prohibited.
Combine levels into visibility groups
You can group levels together to form visibility groups. There are two different types of groups: mutual and simultaneous visibility groups. Use reciprocal visibility groups, e.g. for analyses on one sheet, which would otherwise be concealed. Simultaneous visibility groups are used to quickly connect and disconnect multiple levels, e.g. topography levels (cities, rivers, streets, etc.).
How to set visibility groups
- In the control window, select Content all layers that are to be combined to a group.
- Select Properties from the context menu.
- For mutual (or simultaneous, depending on requirement) visibility group, enter a name for the group - for example, "analyses".
- Levels that have been combined in a simultaneous visibility group can be recognized by a radio button.
Subsequently add layers to a visibility group
- Using the Content control window, select the properties of the layer you want to add to a visibility group.
- In the properties under Total level select Alternatee (or simultaneous) Visibility group the corresponding group name.
Icon buttons

|
Refresh view | Refreshes the view in the Contents control window. |

|
Expand view | Displays the entire contents of the sheets of a workbook. |

|
Collapse view | Hides the entire contents of the sheets of a workbook. |

|
Show sheet content | If this button is activated, the content of the map sheet is expanded when the map sheet is changed. The contents of the other unopened map sheets are closed at the same time. |

|
Visibility changes between always visible > scale dependent visible > never visible. | Allows to better control the states of the levels. If the button is clicked, the layer knows all three states. If the button is switched off, the level knows only two states - depending on the zoom, the initial state is visible or always visible and invisible. |

|
Sort Sheets in Ascending Order | Sorts the sheets in alphabetical ascending order. |

|
Sort Sheets in Descending Order | Sorts the sheets in alphabetical descending order. |

|
Scale Ranges |
Displays the various scale ranges of the individual layers. These can be edited directly here or in the control window Scale ranges. The functions and setting options for the scale ranges are identical in both control windows. The only difference is that in the control window Scale ranges only the contents of a map can be displayed and edited, while in the control window Content the contents of all sheets and maps can be displayed and edited simultaneously. This will occasionally be useful, but can also make the control window content very confusing. If you work with both control windows, you will leave the scale ranges in the control window Content switched off. This makes both control windows clearer. However, you will occasionally have to switch back and forth between the two control windows. If this is too annoying for you, you should close the control window Scale ranges and switch on the scale ranges in the control window Content if required. |

